Ed wallpaper maker tutorial!
[02:23] Edcool1: i think im' gonna make a blog post based on that
[02:23] MadStrife: haha
[02:23] MadStrife: yeah
[02:23] MadStrife: you just
[02:23] MadStrife: totally explained everything
So yeah! Here it is.
Yay.
Okay so I have this picture I found on some website.
Now that is that images full resolution. Not very good looking, right? Certainly not made for a 1680x1050 screen resolution. So what can we do about this?
Step 1:
Make it bigger.
That gives you this...I dunno, perverted jagged ugly version of your image:
 That's bad! It's ugly! Jagged! Worse than the graphics on your playstation2! So what can you do?
Step 2:
Gaussian Blur. Or something.
That gives you this blurred out of focus look, observe:
 Now the jaggies are gone, but...Wait! Something else is wrong! Look at that! It's totally out of focus! No definition at all! Something must be done!
Step 3:
So what I did next was a combination of a grain filter and some kind of brush filter, croshatch maybe? I forget.
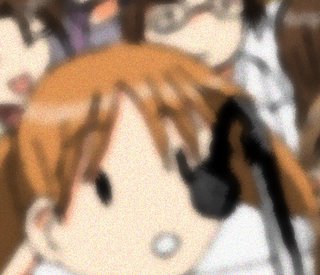
 Now what do we have, grain and some edges, but still blury...Wait what else looks like that? I know! An 8mm film frame!
Step 4 (research)
Thanks to Oliver Stone I will forever think of the Zapruder Film when I think of 8mm.
Observe:
So yeah. Do you see the similarites between that image and the one above it? Kinda blury, grainy and stuff? Yeah!
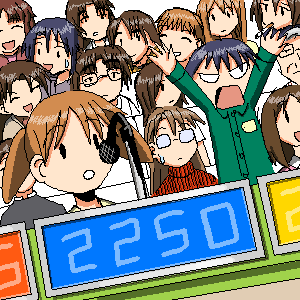
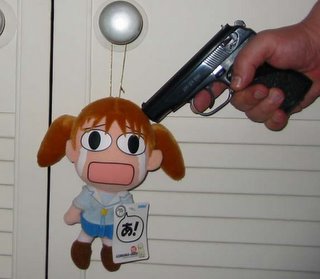
Cause I'm kind of a buff for the Zapruder film, I have at least 5 different copies of it on my computer. I have the original version, a version with the sproket holes in it, a zoomed in version, a stablized version (so you can kind of see how it is a hoax). I got it all. So this innocent picture of Chiyo-chan on the Price is Right reminds me of a man getting his brains blown out. Yes. yes.
Step 5:

So we now have our reference photo! Let's compare it to our desired wallpaper!

Oh crap! Our picture isn't wide enough!
The sproket holes of the 8mm film and the actual 8mm camera itself kind of creat this distorted image over by the sproket holes. I'm not a painter, I can't really fill in what's missing the way it should be done. I can, however, half-ass it.
Stretch it!

Step 6:
Now what's the problem? There's this obvious line from where I stretched it! So I have to now fix that some how, I take the original and overlay it, and then fade it with a gradient mask (taking special care to keep her pigtail unstretched) that looks something like this:

Now the final touches.
Step 7:
Using my reference frame from the Zapruder film as a guide for my sproket holes, I use the magic wand tool and select the white area in those holes and create a color fill from that. I use a fuzzy brush to hide any jaggies from the Zapruder film.
This looks like this:

Step 8:

Now, when you look at the reference, you see that kind of purplish color over on the left side, between the sproket holes? This is most likely from the latent edge code on the 8mm film, but I could be wrong. Could just be more distortions from the camera.
That being said, it's there and I want to re-create it for my wallpaper.
I use the select color command and select the purple. Then I make another color fill for that with the purple color. Check it:

Almost done!
Step 9:
Just put the stretched Chiy0-chan image back underneath the color fills and viola. You got your 8mmized version of Chiyo-chan on the price is right.

Now this begs the question. Why is there an 8mm film of Chiyo-chan on the price is right? My theory is, it was the item they were bidding on--a 8mm film camera. And one of the pretty girls Bob Barker has on his show is shooting film of the contestants. Chiyo is going for the low bid, but feels wrong bidding just 1 dollar. So she bids $22.50. Makes sense to me.
[02:23] MadStrife: haha
[02:23] MadStrife: yeah
[02:23] MadStrife: you just
[02:23] MadStrife: totally explained everything
So yeah! Here it is.
Yay.
Okay so I have this picture I found on some website.
Now that is that images full resolution. Not very good looking, right? Certainly not made for a 1680x1050 screen resolution. So what can we do about this?
Step 1:
Make it bigger.
That gives you this...I dunno, perverted jagged ugly version of your image:
 That's bad! It's ugly! Jagged! Worse than the graphics on your playstation2! So what can you do?
Step 2:
Gaussian Blur. Or something.
That gives you this blurred out of focus look, observe:
 Now the jaggies are gone, but...Wait! Something else is wrong! Look at that! It's totally out of focus! No definition at all! Something must be done!
Step 3:
So what I did next was a combination of a grain filter and some kind of brush filter, croshatch maybe? I forget.
 Now what do we have, grain and some edges, but still blury...Wait what else looks like that? I know! An 8mm film frame!
Step 4 (research)
Thanks to Oliver Stone I will forever think of the Zapruder Film when I think of 8mm.
Observe:
So yeah. Do you see the similarites between that image and the one above it? Kinda blury, grainy and stuff? Yeah!
Cause I'm kind of a buff for the Zapruder film, I have at least 5 different copies of it on my computer. I have the original version, a version with the sproket holes in it, a zoomed in version, a stablized version (so you can kind of see how it is a hoax). I got it all. So this innocent picture of Chiyo-chan on the Price is Right reminds me of a man getting his brains blown out. Yes. yes.
Step 5:

So we now have our reference photo! Let's compare it to our desired wallpaper!

Oh crap! Our picture isn't wide enough!
The sproket holes of the 8mm film and the actual 8mm camera itself kind of creat this distorted image over by the sproket holes. I'm not a painter, I can't really fill in what's missing the way it should be done. I can, however, half-ass it.
Stretch it!

Step 6:
Now what's the problem? There's this obvious line from where I stretched it! So I have to now fix that some how, I take the original and overlay it, and then fade it with a gradient mask (taking special care to keep her pigtail unstretched) that looks something like this:

Now the final touches.
Step 7:
Using my reference frame from the Zapruder film as a guide for my sproket holes, I use the magic wand tool and select the white area in those holes and create a color fill from that. I use a fuzzy brush to hide any jaggies from the Zapruder film.
This looks like this:

Step 8:

Now, when you look at the reference, you see that kind of purplish color over on the left side, between the sproket holes? This is most likely from the latent edge code on the 8mm film, but I could be wrong. Could just be more distortions from the camera.
That being said, it's there and I want to re-create it for my wallpaper.
I use the select color command and select the purple. Then I make another color fill for that with the purple color. Check it:

Almost done!
Step 9:
Just put the stretched Chiy0-chan image back underneath the color fills and viola. You got your 8mmized version of Chiyo-chan on the price is right.

Now this begs the question. Why is there an 8mm film of Chiyo-chan on the price is right? My theory is, it was the item they were bidding on--a 8mm film camera. And one of the pretty girls Bob Barker has on his show is shooting film of the contestants. Chiyo is going for the low bid, but feels wrong bidding just 1 dollar. So she bids $22.50. Makes sense to me.


